


Awọn akoonu
From time to time, when working with spreadsheets, it becomes necessary to change the position of several rows relative to each other. For example, there was a situation in which the data specified by the user was accidentally entered in the wrong cell, and the correct sequence of rows needs to be restored. There is no need to re-enter this information, you just need to swap the rows. Today we will analyze as many as three methods of how to do this, and also describe all their pros and cons.
How to Wrap Rows in an Excel Table
What are these magical methods? There are three main ways to swap rows in an Excel document:
- Using the standard copy-paste tool.
- Using the mouse to wrap lines.
We will divide the first method into two, because each of them has its own specifics.
Method 1. Using the mouse
This is one of the most intuitive ways. Its main advantage is the speed of this action. All you need to have in order to wrap lines is a mouse and keyboard. Let’s take a closer look at what needs to be done:
- Move the cursor to the coordinate bar. There we carry out the left mouse click on the line that we need to move.

- After that, move the cursor to the upper border of any of the cells that are part of this row. Important note: before performing the next operation, you must make sure that the cursor has taken the form of an arrow with pointers in four different directions.
- After that, press the Shift key on the keyboard and hold it down. After that, we move this line to a suitable place. The mouse button must also be held down at this time. The Shift key is needed so that there is no data replacement. If you move the line with only the mouse, without using the keyboard, then the data will simply be replaced, and you will have to roll everything back so as not to lose information.

We see that this method is simple and easy. The main thing is to remember that you need to move the line while holding down the Shift key.
Method 2. Through the insert
Compared with the following method, which we will describe, this method has a huge number of advantages. It allows you to change the arrangement of lines with minimal time and effort. Let’s give a real example of how to work with this method.
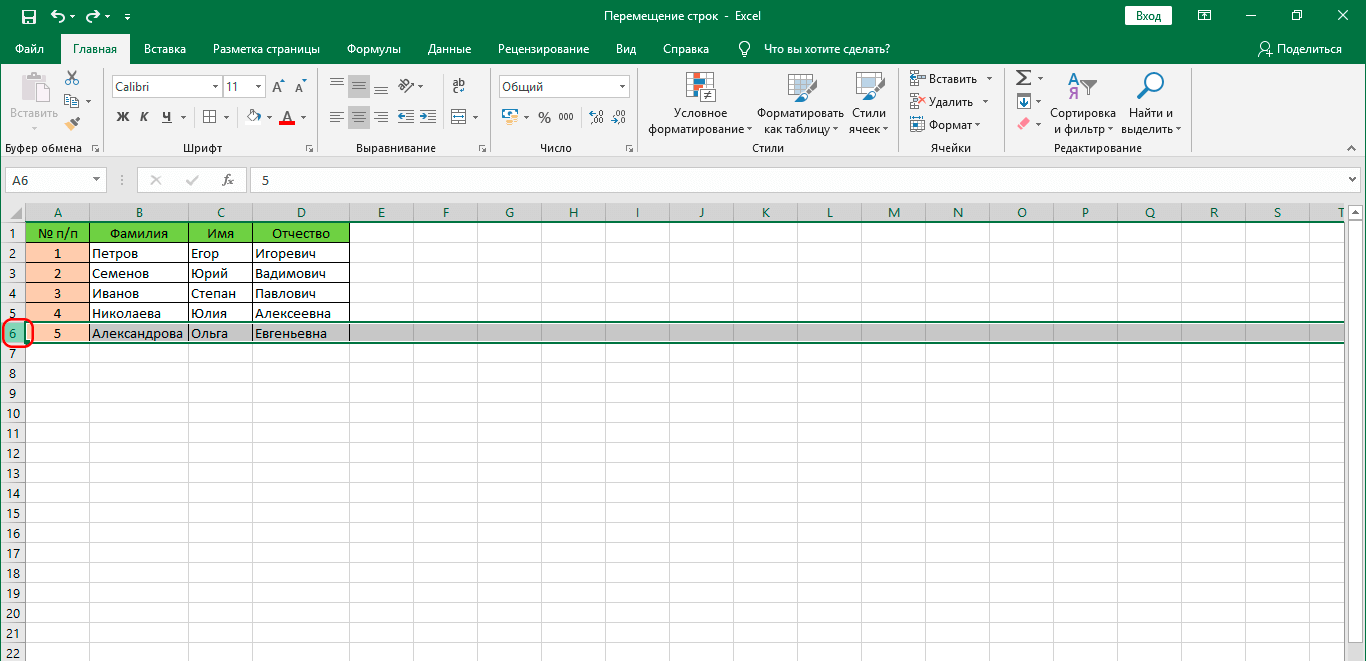
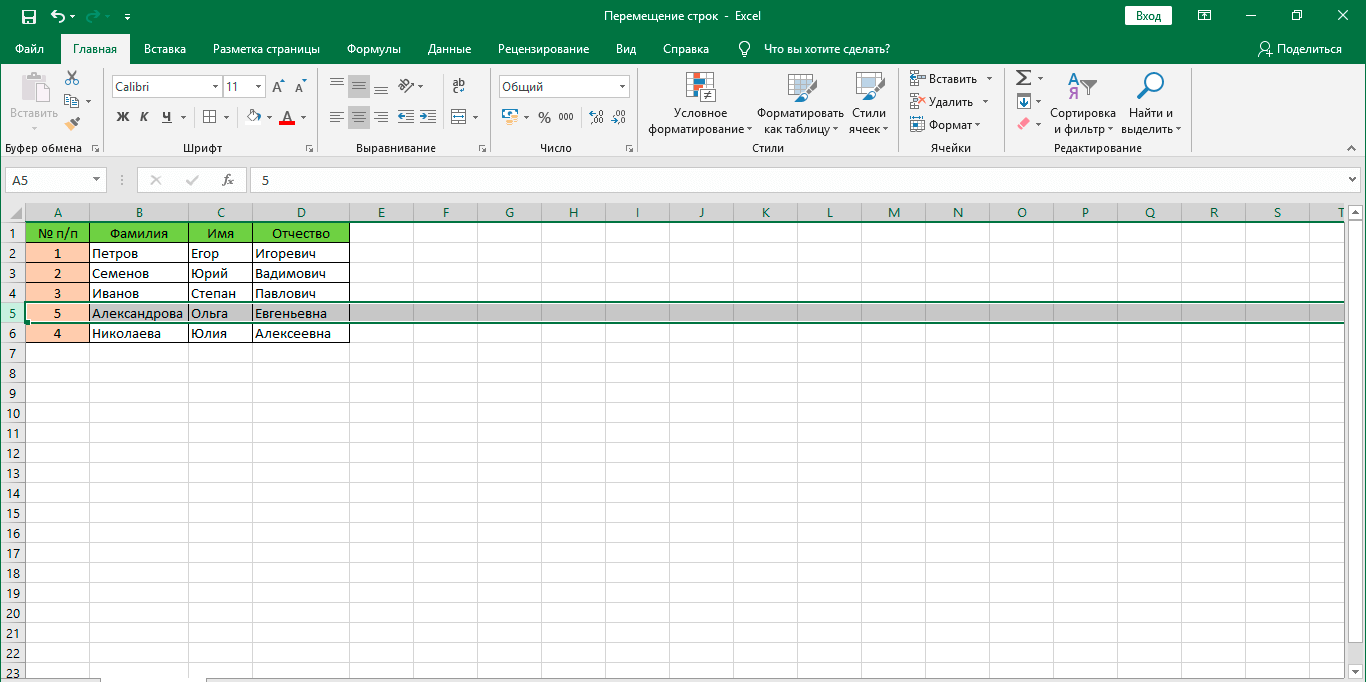
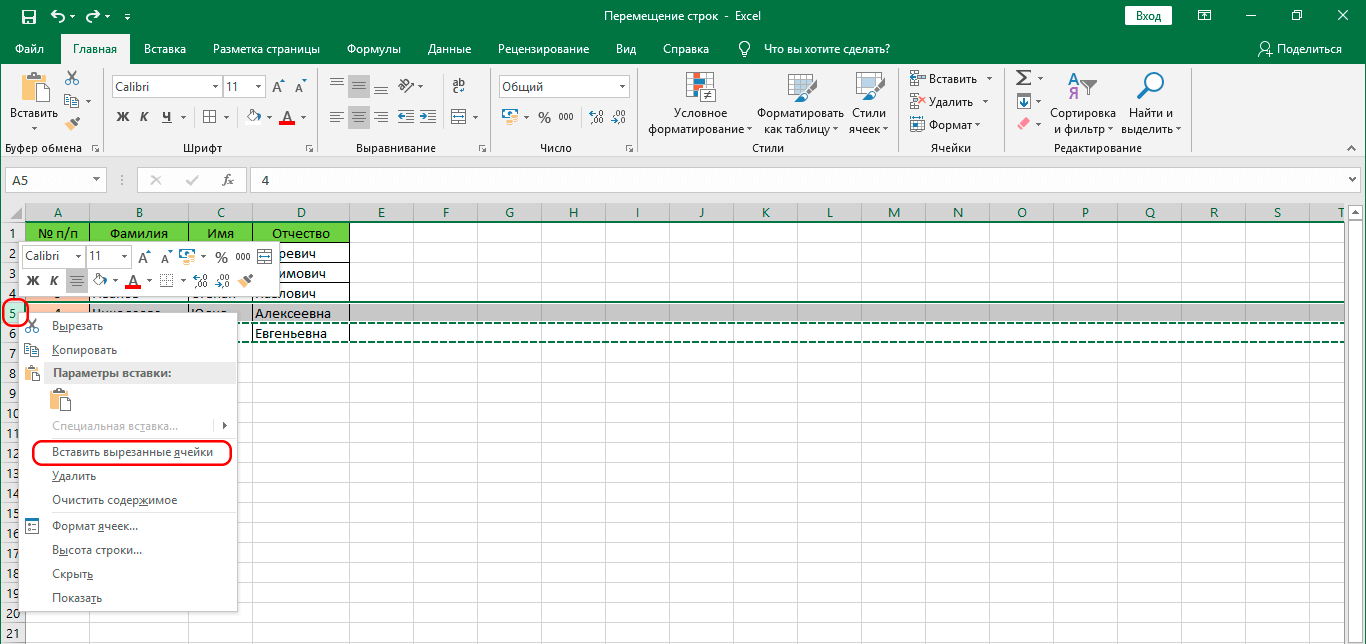
- Find the number of the line we need to move on the coordinate bar and click on it. After that, the entire line was selected. Next, we look for the “Clipboard” block in the ribbon, in which we look for the “Cut” button. The block itself is located immediately on the left side of the tape. In addition, a good option is to use the context menu. To do this, right-click on the corresponding line and find the “Cut” item. You can also use the keyboard shortcut Ctrl + X.
- Next, you need to right-click on the line that is located under the place where you want to insert the cut line. After that, in the menu that appears, select the “Insert cut cells” item.
- After completing these steps, the line will automatically move to the correct place. At the same time, no changes in the sequence of other rows are observed.

This method makes it possible to wrap lines in just three steps. PHowever, this method is significantly slower than the previous one, since it is necessary to launch the context menu, search for the corresponding tools in it, as well as on the ribbon. But compared to the following method, this one is pretty fast. Let’s move on to the method that takes the most time, but it should still be known to a professional Excel user.
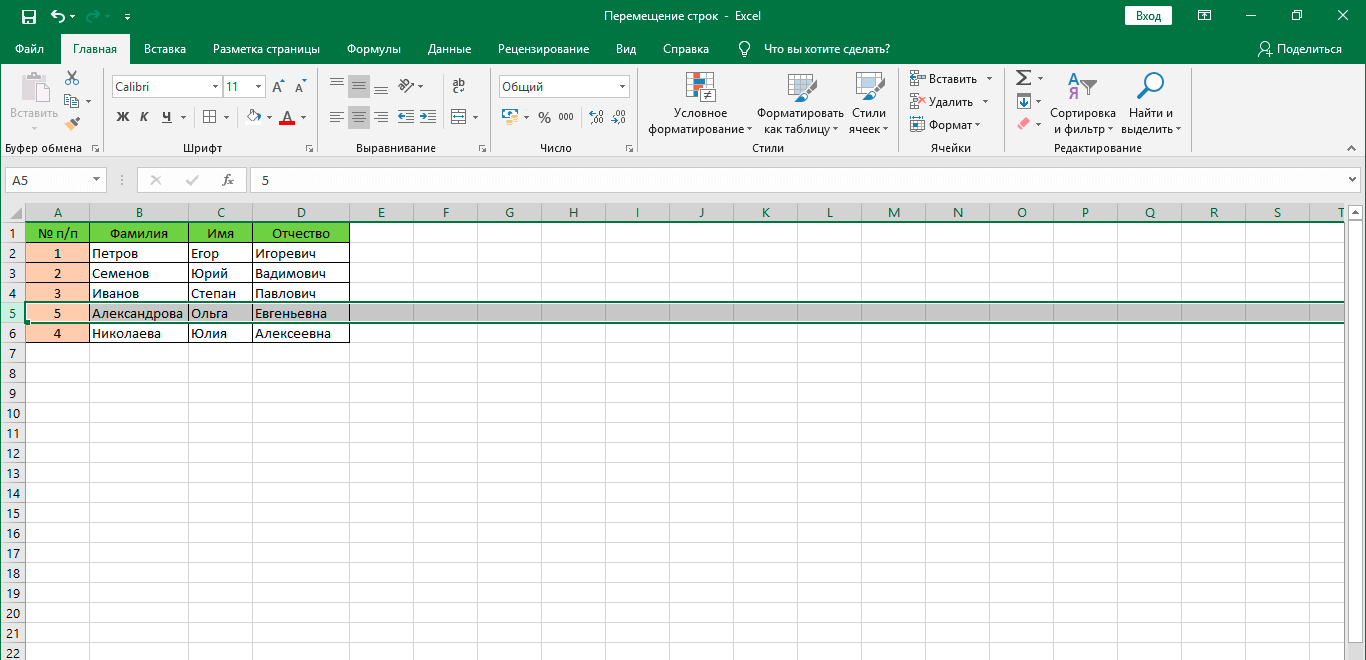
Method 3. By copying
This method is very similar to the previous one, but it requires the user to perform some extra steps. This method implies the need to create an additional row without any information, then copy data from the original row into it, and then remove duplicates. Let’s see in practice how this is done.
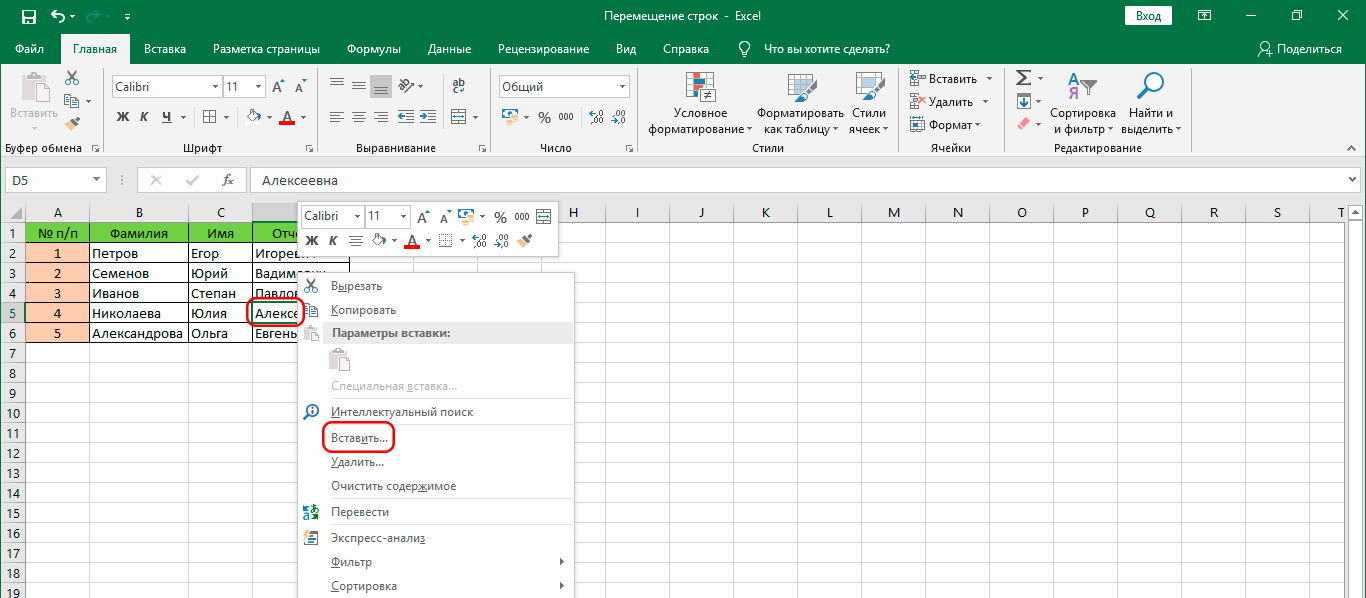
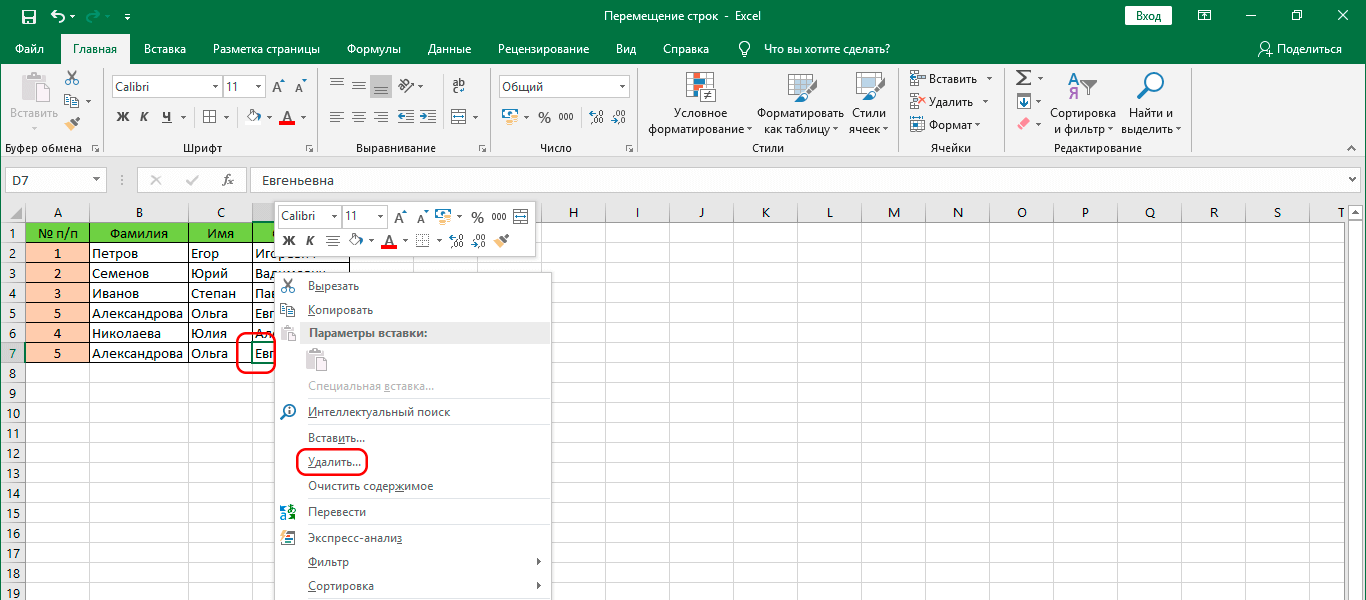
- It is necessary to select a cell in the row under the one where we want to insert data. Do a right-click and a context menu appears. In it, select the “Insert” item.
- After that, a small window will pop up where you need to select the “line” item. We confirm our actions.
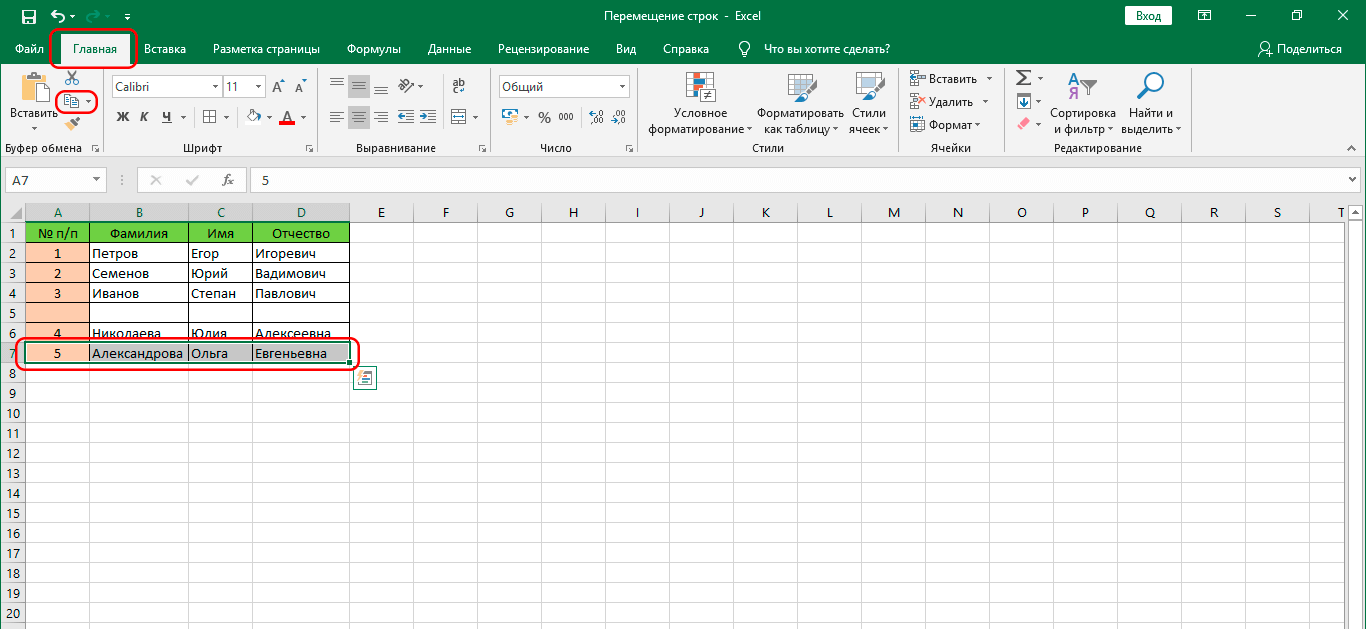
- After that, an additional line will appear, which now we need to select the row that we need to transfer to the newly created one.
- Right click on it and copy. You can also use the corresponding tool on the ribbon or press the Ctrl + C keys. The user can choose the method that is most convenient for him.
- After that, click on the first cell in the newly created row and click “Paste” or you can also use the key combination Ctrl + V.
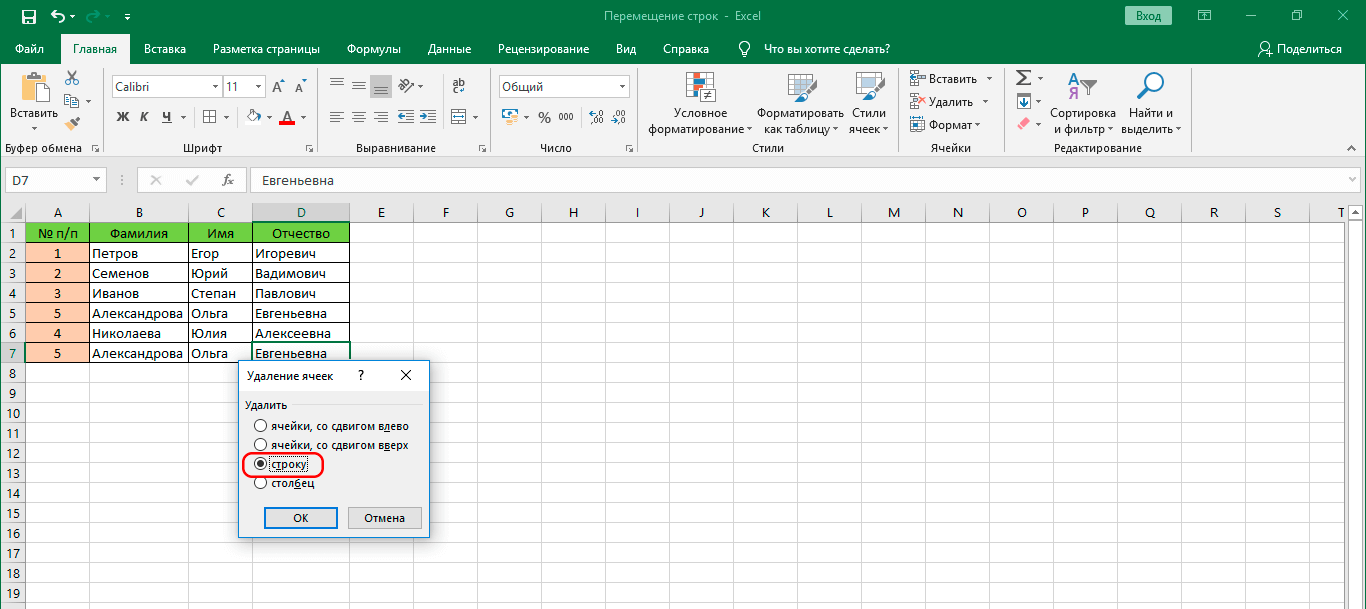
- The next step is to remove duplicates. To do this, right-click the cell from the original row and select the “Delete” item in the list of functions that appears. Similarly, a window will appear in which we need to select the “line” item and confirm our actions.
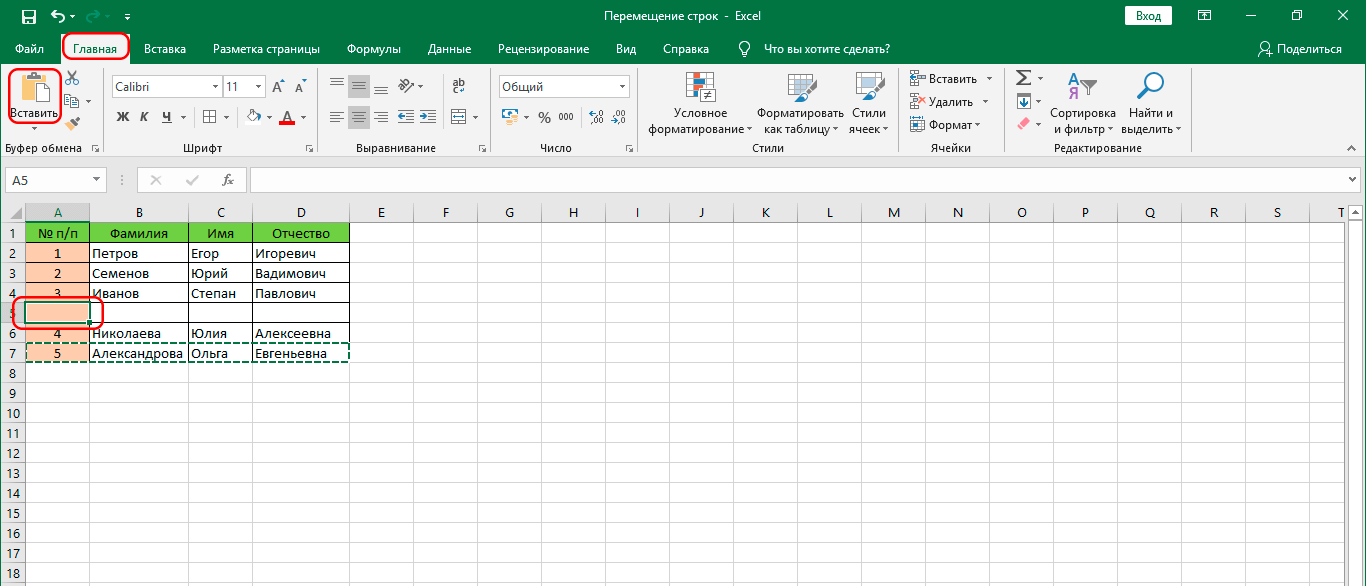
As a result, our line has been moved from one place to another. As you can see, this item required a large number of additional actions. It is not well suited for moving large numbers of rows. Mistakes are also possible, because in practice it is very easy to forget to delete the old line.
When you might need to wrap rows in Excel
There are a lot of situations when you may need to wrap rows in Excel. For example, the order in which goods are laid out plays a role. Or the user wants to prioritize some data. For example, a lot of people write down their daily plans in Excel and sort things in this way, sending the first ones to the top, and the ones that can wait to the bottom. No matter what the reason for wanting to learn line wrapping is from you, you now already know how to do it. A little training, and you can put your knowledge into practice. Good luck.