


One of the new features of Microsoft Word 2010 is the ability to take screenshots (screenshots) and paste them directly into your document. This should greatly speed up the creation of the document, and today we will show you how to use it.
Screenshots in Word 2010
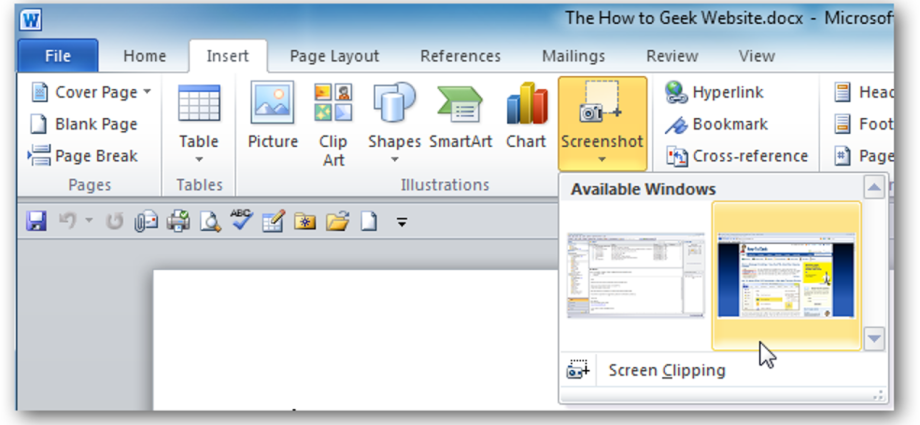
To take a screenshot, go to the tab Fi sii (fi sii) ati ni apakan awọn aworan apejuwe (illustrations) select team screenshot (Picture). Menu will open Available Windows (Available windows), which will show thumbnails of all active windows currently open on your desktop. You can also take a screenshot yourself by selecting Pipa iboju (Screen clipping).
In this example, we have selected an image from a Firefox browser that has a window open. The drawing immediately appeared in the document, and the tab opened Awọn irinṣẹ Aworan (Picture Handling) in case you need to further edit the picture.
If you want to capture a specific area of the screen, select Pipa iboju (Screen clipping).
When the screen is covered with a translucent haze, indicate the area that should be included in the picture. To do this, press and hold down the left mouse button and select the required area of the screen.
The snapshot will immediately get into the Word document and, if necessary, you can edit it.
This very handy feature helps you create documents much faster. You no longer need to think about buying and setting up a third-party program to create screenshots for Microsoft Word.